Sunday, April 3, 2011

CONTEST LOOK HERE v

Sorry, I've been so busy and I've had no chance to blog about this. The contest that ended 3/31 is going to be redone. Sorry I know its upsetting. I had NO official entries. I had a couple likes on my facebook & my blog but no one emailed me to say that they were entering in the contest!

REMEMBER you must email me if you want it to count!

1. Like my facebook (1 entry)

2. Follow my blog. (1 entry)

3.You also receive a new entry EVERY time you update your status to:
Check out this contest! Win mark. makeup by doing this!
(& you must put the link to this blog which is http://www.markgirl.blogspot.com/ in the add url section on facebook for it to count as an entry.
 On facebook, twitter, myspace, your blog, etc. (please don't spam your friends! Max 14 per day)

4. Extra entry per day share my mark store  on facebook, twitter, myspace, your blog, etc!

So please remember to email me at this address:  MARKGIRL@GMX.COM

Friday, April 1, 2011

GTL: Envy Green Eyes!

Once anyone see's these gorgeous color on you they'll die of envy. Okay, maybe not die lol. But they'll definitely ask you where you got that eyeshadow from! mark. of course! 

BY MAKEUP ARTIST ANTHEA KING

EYES:
• Sweep i-mark in shade biscotti from lash lines to brow bones; top with i-mark in shade dragonfly on the lids up to the brow bones.

• Apply i-mark in shade retro peacock in the creases, extending the shade at the outer corners of the eyes.

• Run no place to run in shade jet set along the upper lash lines.

• Run no place to run in shade grassroots just above shade jet set along the upper lash lines as well as along the lower lash lines.

• Sweep i-mark in shade retro peacock right under shade grassroots along the lower lash lines.

Find all these and more! at www.mymarkstore.com/nreagan 

Eye Kits to Compliment Brown, Green, Hazel, or Blue Eyes!


You have to love these new eye kits. They not only enhance your eye color, they look great with contacts too! They really make your eyes pop just check out the pics below.

HAZEL/Green EYE KIT Green is the color of envy—and with good reason! When you flash your peepers wearing these shades, everyone will want your look! Green's complement is red, so our i-marks play off that theme with a tertiary color, violet, in our no place to run eyeliner for an extra kick. Make it big mascara in espresso enhances the brown in hazel eyes and gives them richness.


BLUE EYE KIT If you've got beautiful blues, you naturally should play them up! As Jamie Greenberg described on the first page, the complement to blue is orange, so pick i-marks in bronze and orange hues to draw out your color. Choose a brown liner—the warm undertones help enhance the orange in the i-marks.


BROWN EYE KIT Brown isn't exactly one place on the color wheel, but actually most shades in the yellow, orange and red families involve brown, which works to your advantage with complementary colors because that means you have more options. Cooler hues are across from the earthy warm brown families, so choose jewel-toned i-marks to really make your irises sing!

Each Kit retails for just $25 for the Mascara, Waterproof Eyeliner, 2 i-mark Eyeshadows, plus the magnetic Snap To It case to click them in!  www.mymarkstore.com/nreagan

Free Shipping Codes: 
WELCOME: Free Shipping for 1st time customers
MARKFS30: Free Shipping on orders of $30

Tuesday, March 22, 2011

NEW mark. zip around bag (HOBO)

Yes, I know I've been neglecting my blog sorry! During my vacation however mark came out with a new bag, similar one before but this one is super cute. I am obsessed with the blue color however, I did get the silver recently for a customer. As promised on facebook here is the photos!

Zip Around Bag: Textured (faux-leather) hobo bag, with bottom zipper expansion
Features pyramid-stud turnlock closure and 3 interior pockets
Available in: Stone and Cerulean
 
Get it for only $32 right now or $10 off with select mark. products!

I love the new mark. felt liner!

I've always used liquid liners so I love that mark. came up with these. They already had liquid liner hook-ups but I love that these are more of the marker types! My fav! :)


I was actually asked to do a tutorial on facebook so I might post that in a while. I thought I already did one lol guess not. Of couse I will use the new "what a line" felt liner which btw is JUST $9.00 how can you argue with the quality your getting?

Friday, December 24, 2010

And also the cake!

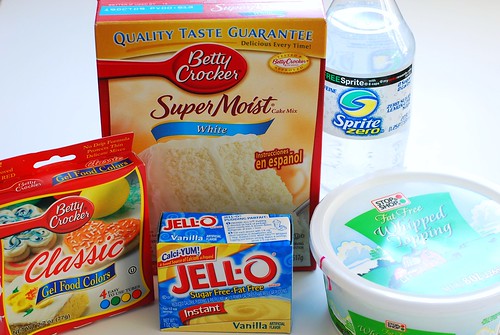
So yes there are people that refuse to do cupcakes because "they are too damn hard to frost!" Really? Hmm, well here is the cake version of these wonderful cupcakes. Okay, on with the ingredients.
how to: rainbow cake!
That’s all. Notice the lack of fat in here? Mmmmmm . . . chemicals. Though I don’t need to defend my method thanks to the double-dub (WW) aspect, even when I make a “real” cake I usually use box mix because let’s face it: Betty’s been doing it way longer than I have, and has pretty much perfected the art.
Pour a can of soda (12 oz) 2-12 oz cans of soda into the cake mix two boxes of cake mix. No eggs, no oil, no water, no sweat.
how to: rainbow cake!
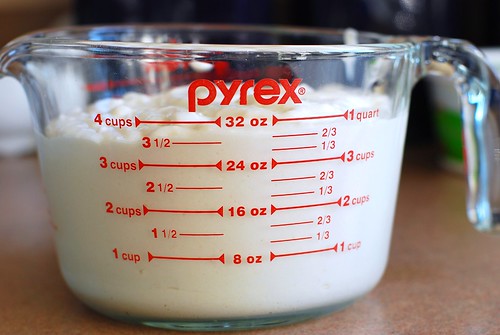
The action shots weren’t too thrilling. Now we measure it.
how to: rainbow cake!
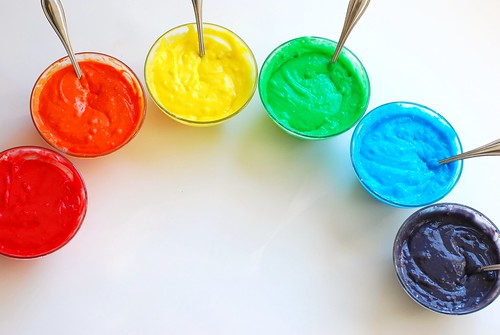
I’m going to round to 30 oz 60 oz because I have six colours and isn’t that just too convenient? It worked out to 3/4 c 1.5 c per colour, measurementwise. So I divvied that up and used my gel colours.
how to: rainbow cake!
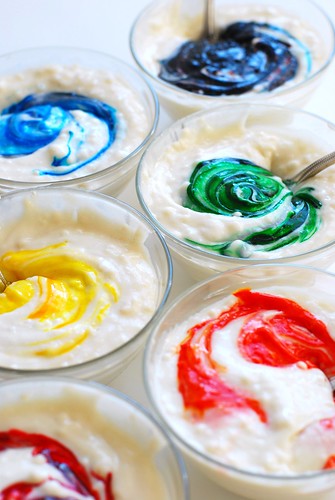
(the gel colours, while not as good as pigment dye, are much bolder than the very liquidy food colouring you probably grew up with)
how to: rainbow cake!
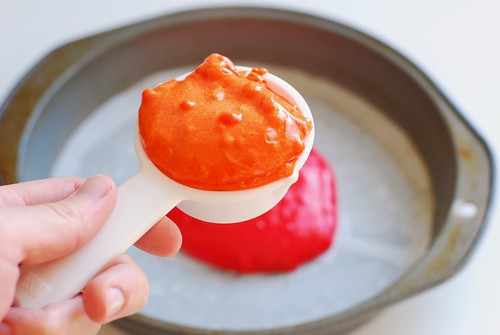
The first colour you drop into the pan, use about 2/3 of the mix for that colour. Otherwise, the top (last) colour will really dominate. I used a heaping 1/4 c 1 cup of each colour.
how to: rainbow cake!
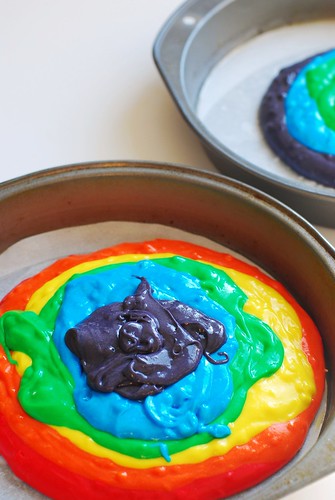
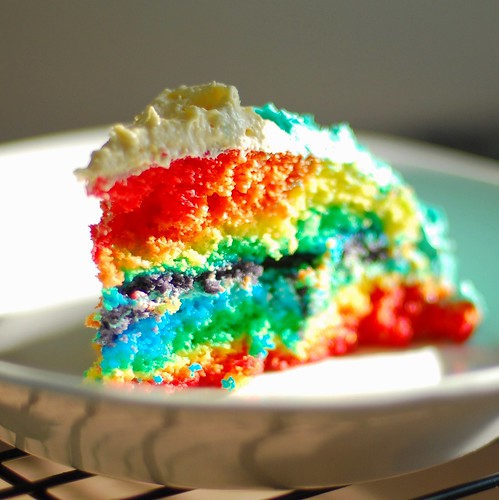
Drop the colours, one by one, into the middle of the pan, in neat concentric-ish gobs. Remember the cake is going to be sliced in the side there, so mixing it around on top isn’t going to make your slices any more psychedelic (trust me, I did the three-dimensional thinking for you already).
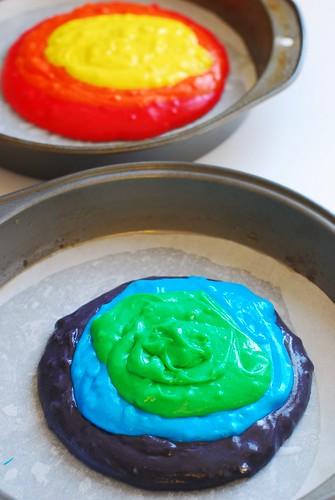
When you’re three colours in, start doing the reverse with the other pan. Since I’m going in rainbow order: red, orange, yellow, green, blue, purple, I got from red to yellow in the first pan, then purple, blue, green in the second. This is so that your two pans are equal if your measurements aren’t exact (and they’re not likely to be).
how to: rainbow cake!
Now finish up.
how to: rainbow cake!
Follow the box’s baking instructions and do your dishes.
how to: rainbow cake!
Such lovely dishes!
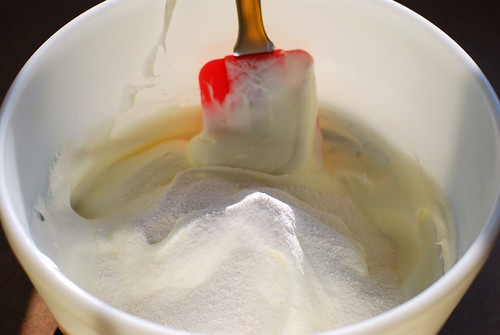
Now for the frosting: 1 box 2 boxes of fat free sugar free pudding mix, and 8 oz 16 oz (two of the 8 oz tubs pictured) of fat-free whipped topping. Or sugar-free. Or light. Or regular. They’re all pretty much the same. But that’s it.
how to: rainbow cake!
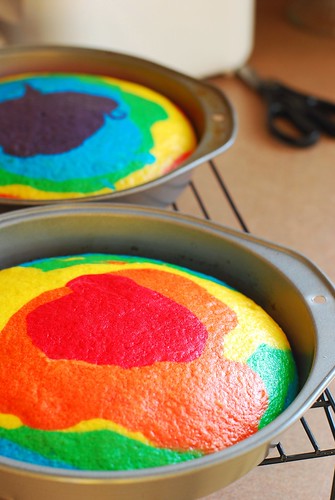
Holy shit, the cake’s done! Toothpick clean and everything! Get that shit out of the oven!!!
how to: rainbow cake!
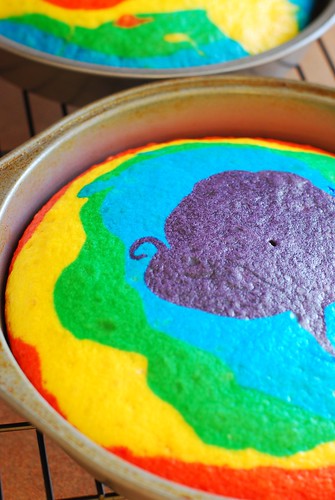
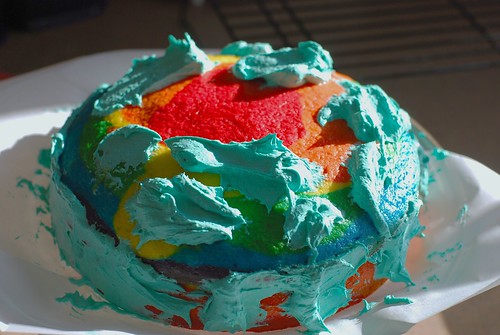
The purple top kind of made a little turkey silhouette.
how to: rainbow cake!
The frosting will be a little tough to spread, so treat it like a buttercream (I guess, I’ve never frosted a cake with buttercream). Putting gobs all over, then smoothing in worked well for me.
how to: rainbow cake!
And look at that thing! It’s so pretty-lookin.
how to: rainbow cake!
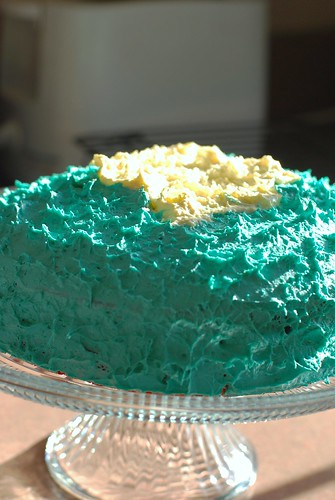
Here’s what this particular cake looked like. See how it’s tiny and too rounded and it kind of isn’t all that great? That’s because I didn’t double the recipe. It’s a mistake I’ll only make once.
how to: rainbow cake!
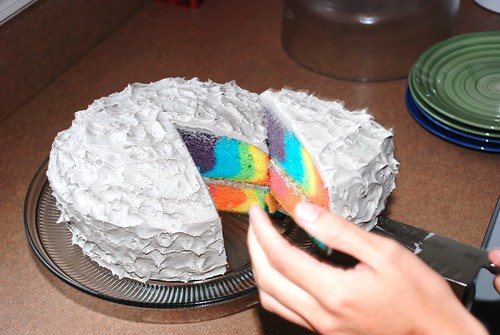
Here’s what that really should look like: same process, twice the batter.
DSC_0598
Mmmmm.
Sunny Day Rainbow Cake
2 boxes white cake mix
24 oz of clear diet soda (2 cans, ginger ale and sprite work well)
gel food colouring
16 oz whipped topping
2 oz instant fat-free sugar-free pudding mix (2 smallish boxes)
The Dieting
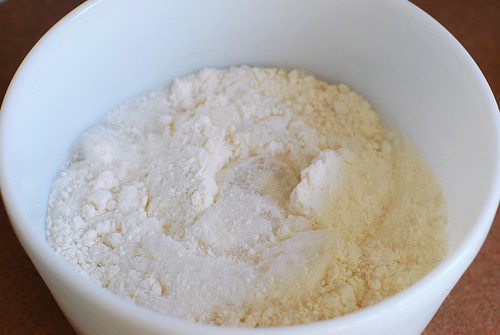
Mix the cake mix with the soda according to regular instructions on box. It will be lumpy afterward. Again, you can use any white cake recipe you want, this is just how I do it.
The Rainbowing
Measure the total volume (by my estimate, 64 oz), then divide by 6 and measure into separate bowls. There are 8 oz in a cup, so 64/6 = 10 to 11 oz, or 1 cup + 2 tbsp.
Stir colour into each bowl with its own spoon. For the first colour into the pan, measure out 2/3 to 3/4 of your mix (in this case about 1 c) as close to the middle as you can. Drop in your first three colours, then work on the other pan with the last three colours. So if you’re doing rainbow order, the first pan should have red, then orange, then yellow, and now the purple, blue and green go into the second pan. As a recap, this is so both layers are roughly the same size.
Bake the cake for however long the box tells you to bake it. Check it when the box says to, but usually it’ll need an extra 5 or 10 minutes or maybe more because of the density of the soda method. Just keep baking, checking back every 5 minutes or so until a toothpick to the center comes out clean. Let cool completely before moving to a wire rack.

New Years is almost here; so I thought I'd bring you some . . .

Amazing cupcakes! With everyone doing the red and green thing right now why not try to do something completely different for your new years eve party?


Gel food colors work especially well for this. Gel color adds a ton of color with a small amount of dye. You can find gel colors at craft stores like Michaels and Roberts, and in the cake decorating isle of Walmart. If using red, make sure to get the one that says "No Taste"


Divide your batter and tint each one


Then layer it by color into the cupcake papers.  (See my tips in the recipe for easy layering).  Sometimes I do red on top and sometimes I do the reverse so blue is on top.


Bake them up


And cool them on a rack before frosting.


Then you can frost and decorate to your heart's desire!


The best part comes when you peel off that paper.  Use white liners to show off the colors, or foil or dark liners to make it a surprise!


Even better is taking the first bite and seeing the inside:


Try them with the color of your favorite sports team, or your kids' school colors.  They're sure to be a hit!

Colorburst Cupcakes

1 white cake mix
2 eggs
1 C yogurt (any smooth textured fruit flavor is fine!) or sour cream
1/2 C milk
1/3 C vegetable oil

Combine all ingredients until incorporated (about 30 seconds). Scrape sides of bowl and then beat on med-high speed for 2 minutes.

Divide batter according to how many colors you are using. I used 5 colors and it worked out to a little over 1 cup for each color, but each cake brand will be slightly different.

Use food coloring to color batter to desired intensity.


To get a layered stripe like I used, you'll want to put a spoonful of each color in the cupcake one at a time. The batter is thick, so it won't spread on it's own. A great tip is to set out a little bowl of water where you're working. Dip your finger in the water and then gently spread the batter out. The water will make it so the batter doesn't stick to your fingers.

Another tip is to use a measuring spoon and some water to measure out how many teaspoons/tablespoons are going to fit in your cupcake. Then divide that by how many colors you have so you know how much of each color to use for each cupcake. For my 5 colors, it worked out perfectly with 2 t of each color in each cupcake. So I put in 2 t of blue in the bottom of each cupcake and spread it out with my finger. Then I put in 2 t of green on top of that, then yellow, etc.

Bake them according to the package directions, until a toothpick comes out dry.

Monday, December 20, 2010

Yay! New mark. looks with mark. makeup Artist & special insider interview!

Wow, yes this is really coming look out for this. I have scheduled an exclusive mark. interview with mark. makeup artist Veronica. She has also helped make some gorgeous looks just with the mark. makeup line :)

Friday, December 10, 2010

mark Holiday Gifts

ahh....so finally Christmas is only 15 days away! And mark. is offering soo many gifts with purchase. The first is a free juice gem with an $18 purchase, not bad since average is around $25.
This offer will NEVER go bad when you shop with me :)
I love juice gems, I still use the one I got when I signed up :)  Sooo....here's my quick basic review on these. They come in a variety of colors and I'm sure anyone can find a color they'd like. There are shimmer colors and more obvious lip gloss ones. My only problem with them,  is that they tend to be slightly sticky. Not really bad, I've used worse, but I know some people that will refuse to use anything even a bit sticky. Wierdly not all the colors are sticky and some not at all, so I'm not sure if its a manufacturer glitch that some are and most aren't. But I love the glow baby glow and glow baby glow luxe hook up line better anyways lol.


mark. by avon Christmas promo :)
Anyways then there's the promo that's been going on for a week now (lol I know sorry I'm late) Please excuse the label on the pic it's from my facebook "fan" page which you can find here :) I love the promos they do because it really gets the customers excited! They can buy something for their mom or coworker and get something for themselves! Who wouldn't want a gift just for being thoughtful lol.

I did have one customer tell me that some of the promo offers just wouldn't work with her skin type, so after some thought I have an offer. If you get the promo items and find that you don't like the colors or already know you won't like them EMAIL OR MESSAGE ME with the colors you DO WANT and I will switch them out for you. I can even try to get you another product of equal value :)

Since I've been offering this deal my customers seem even more happy lol. I would too haha. Let me know what you think & like my facebook page .

Your mark. girl,
Nayeli

Wednesday, December 8, 2010

Amazon Makeup Mirror

Okay so yesterday I finally decided it was time to stop trying to use my bedroom mirror. I usually believe in natural light so I open the blind and let all the sun pour in & use the humongous mirror thats also a closet door (?)

Anyways I went to some different stores here and couldn't find what I really wanted. I tried the mirrors that stand alone and usually have a magnified side but I didn't really like them and I was super tempted to keep looking in the magnified side and pinpointing all my flaws lol.

Finally I decided I was going to try Amazon and narrowed it down to these two. After reading both reviews for the products I chose the Jerdon and I'm hoping to find it works         as  good as they say! Wish me luck and I'll keep y'all posted!


Monday, December 6, 2010

Wow!!! NEW mark. products!!!

These have been out since Friday and are only $6 each!


Here they are:
mark. Brow Factor Hook Up Brow Gel 
(right now there's only clear :( I'm sure they're just trying it out to see if there's a customer base first & then they'll add more colors!)


mark. Just Tweezing Hook Up Tweezers
These are sooo cute. It opens up at the bottom with like a button type thing & a mini little portable (not lose-able) pair fit in!


Please let me know what you think about them & it you would even purchase. Price for both is $6 right now, MIGHT change but I doubt it. To purchase your own please email me at markgirl@gmx.com & I'll be happy to send you some before other customers can get them!

EDIT*
 

I just found this lol; Ashley Greene (Alice; Twilight Saga) is beautifully showcasing these along with celebrity makeup artist Mai Ouynh. I know its kind of blurry if you really want to know EXACTLY what it says please email me & I can email you the original (I had to resize it so it wasn't huge) or I can just upload it on here!

Step 1: Tweeze

Step 2: Fill in with imark. color Espresso

Step 3: Set with brow factor

DONE!! 


Get a free download from Amazon! 


Friday, December 3, 2010

So complicated! OMG

Ugh, I'm STILL trying to get all the documents in one small link but I don't seem to have any time lately & at the same time I feel like I just spend all my time on here! lol

If you can help please email me! markgirl@gmx.com I have to go Christmas Tree shopping now yay!


Love & Lipclick,
♥ Your mark. Girl ♥

Wednesday, December 1, 2010

mark. gift card, certifcate, & more for reps!

Here are some of the amazing mark rep documents I've found on the web and forums. Please click on the link & you'll be taken to the download page. If anyone knows how to just put a download link let me know!

mark Dare To Compare & In The News 2010

PLEASE CLICK THE LINK TO BE TAKEN TO PAGE: DOCUMENT IS EITHER PDF OR WORD


Mark. D2C and in the News


Mark. Dare2Compare and in the News

imark by mark. [AVON]

PLEASE CLICK THE LINK TO BE TAKEN TO PAGE: DOCUMENT IS EITHER PDF OR WORD


imarks


imarks

Get The Look: Ashley Greene [Twilight]

PLEASE CLICK THE LINK TO BE TAKEN TO PAGE: DOCUMENT IS EITHER PDF OR WORD


Get the Look Ashley Greene


Get the Look Ashley Greene

Skin Care Flyer

PLEASE CLICK THE LINK TO BE TAKEN TO PAGE: DOCUMENT IS EITHER PDF OR WORD


Skin Care Flyer

mark. 2011 Planner for Reps!

So I'm currently trying to find everything I can for Reps so bare with me if I post a million times! Here's a 2011 Planner from Krysty off the mark. Rep Forum.

Mark Rep 2011 Planner

Sunday, November 28, 2010

mark. Eyeshadow & Blush Review.....

EYESHADOWS
 
I have to admit that Mark has improved the quality of their eyeshadows. When they first came out they had very poor pigmentation and they seemed to dry quickly making the eyeshadow useless.
Each eyeshadow is $5.00 and the size is actually pretty good, kind a big actually.
Mark recently came out with their matte collection of eyeshadows. Most of their eyeshadows where shimmery and some had that lustre finish.  
Let me say I'm totally in luv witht the matte collection.
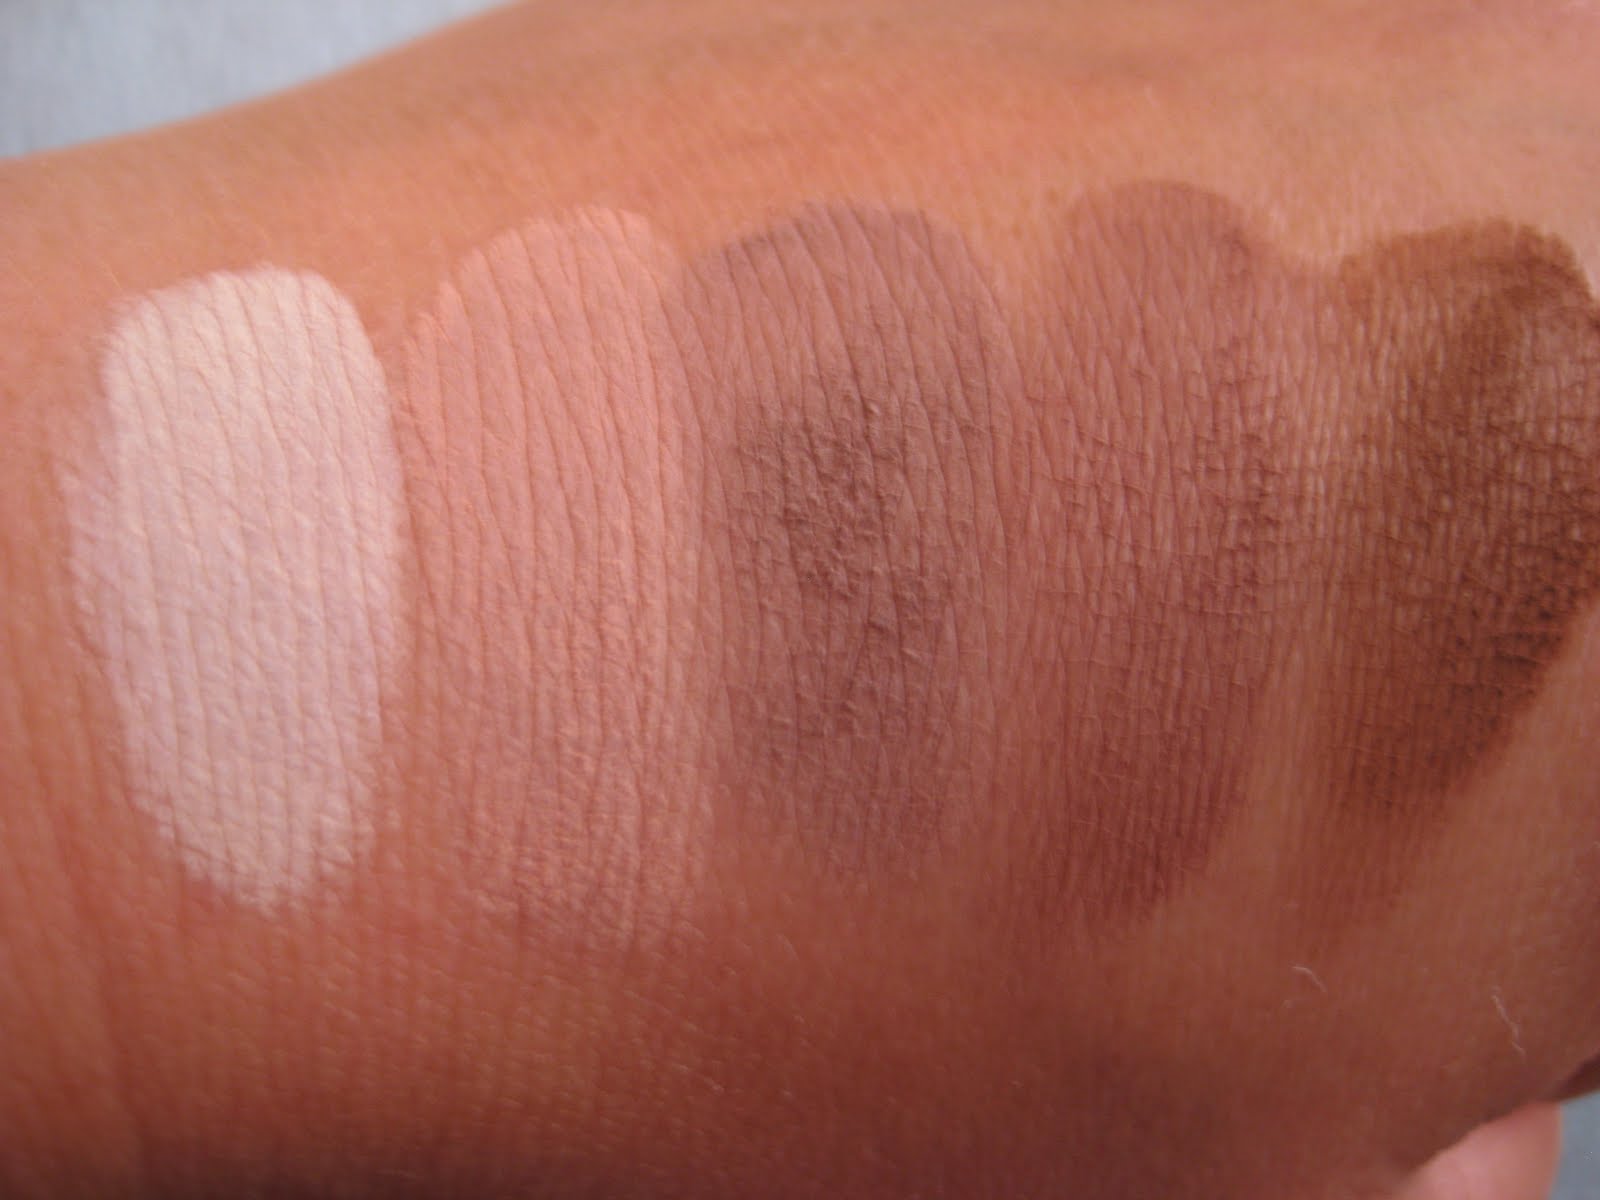
Below you can see all eyeshadows I own and swatches.

Whisper, Latte, Wink Wink, Hollywood, Espresso
My FAVORITE
I use these colors to blend any harsh lines on my crease
Whisper as a highlight you can see I hit pan already.
These have very silky, creamy and soft texture, but are powder shadows.
I just LOVE these.


Minx, Giogia, Tiki, Magic & Vintage Khaki


Apple, Piccadily, Pool, Ocean Drive & Night Owl
All colors above are very good in color pigmentation and texture.

Biscotti, Crush, Nomadic & Fairy Dust


Victorian Lace, Glitterati, Java, Corset & Retro Peacock

Victorian Lace & Glitterati seemed to be very similar here in the picture but they are actually very different.
Victorian Lace is a silver with a lavender sheen and the texture is smooth and pigmentation is very good.
Glitterati is a silver color with glitter and has a lustre finish (not a fan of lustre eyeshadows)
Java, Corset and Retro Peacock are very nice and pigmentation is great.


BLUSHES
I'd have to say I really love each of the blushes I own. The price on the Blushes are $7.00 the size is a good one too, texture is great color is great I just really like all of these, with one tiny exception Golden Glo, it has that lustre, glittery texture and when I put it on it looks like I just have glitter all over my face. So I'd pass on that one Kitten Glo is another one that just shows up as glitter with a very light pink/white color. I didn't show a picture of it because it just wouldn't show on camera.
So hope you like these!


Star Glo       Cameo Glo
    Chica        Sun Love Glo
Bronze Glo    Golden Glo


With no Flash
Star Glo, Cameo Glo, Chica, Sun Love Glo & Bronze Glo

With Flash
Golden Glo is the very first one that all you can see is GLITTER


These are Marks eyeshadows in
Latte and Apple
I also use these as blushes and they look very pretty.